Artikel»Schleifsteine»ATOMA Diamond»
ATOMA
140
89,00 €
Auf Lager verfügbar
(39)

Die meisten Anwender wissen, dass ein Schleifstein regelmäßig abgerichtet werden muss, doch viele sind überrascht, wie schnell sich eine Vertiefung bildet. Selbst wenn du mit bloßem Auge nichts erkennst, kann sie bereits nach 1–2 Anwendungen entstehen. Das verringert den Kontakt zwischen Stein und Messer und macht das Schärfen weniger effektiv.
Wie schnell sich ein Stein abnutzt, hängt von seiner Härte, der Schleiftechnik und dem zu schärfenden Stahl ab.
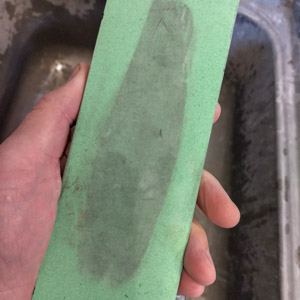 Ich zeige Kunden oft diesen grünen Naniwa Pro 400 als Beispiel. Wenn man mehrere Messer hintereinander schärft, merkt man spätestens dann, wenn der Fortschritt ausbleibt, dass der Stein eine Mulde bekommen hat. Die Vertiefung wird meist erst richtig sichtbar, wenn man mit dem Abrichten beginnt.
In diesem Beitrag lernst du, wie du deinen Schleifstein effektiv abrichtest und worauf du bei der Wahl eines Abrichtsteins achten solltest. Das Abrichten ist ein wesentlicher Teil der Pflege – ohne diesen Schritt bekommst du nicht die Leistung, für die du bezahlt hast.
Die Antwort lautet: nicht perfekt – aber ausreichend plan.
Wenn du weißt, was du tust, und verstehst, wie sich eine Mulde auf das Schärfen auswirkt, kommst du erstaunlich weit. In der Praxis ist entscheidend, dass der mittlere Bereich des Steins plan ist.
Eine gute Faustregel sind etwa 6 cm vom Zentrum in beide Richtungen, also rund 12 cm plan Fläche bei einem Standardstein. Das reicht für sauberes Arbeiten.
Kleinere Unebenheiten an den Enden sind meist unproblematisch. Sie entstehen häufig durch falsche Technik oder einen schiefen Abrichtstein.
Die Wahl des richtigen Abrichtsteins ist nicht nur eine Frage der Körnung.
Ein häufiger Irrtum ist, dass die Körnung alles entscheidet. In Wirklichkeit spielt die Zusammensetzung des Steins eine größere Rolle. Manche Schleifsteine setzen herkömmliche Abrichtsteine schnell zu, sodass praktisch nur Diamantplatten zuverlässig funktionieren.
Besonders anspruchsvoll sind harte und grobe Steine wie der Shapton Kuromaku 120.
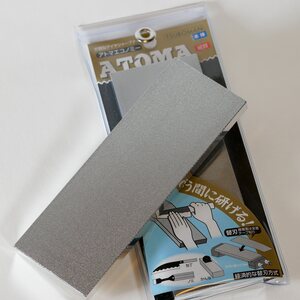
Diamantplatten sind effektiv, müssen aber nicht ausschließlich zum Abrichten gekauft werden. Eine Atoma 140 funktioniert zum Beispiel sowohl als Abrichtwerkzeug als auch als grober Schleifstein.
Viele Kunden entscheiden sich dafür, weil ein Werkzeug zwei Aufgaben erfüllt: Abrichten und grober Materialabtrag. Oft ist das genau der Punkt, an dem das Schärfen plötzlich funktioniert.
 Artikel»Schleifsteine»ATOMA Diamond»
ATOMA140
89,00 €
Auf Lager verfügbar
(39)
Grundregel:
Wenn du einen slurry-basierten Schleifstein verwendest, lässt er sich mit fast jedem gröberen Abrichtstein plan halten.
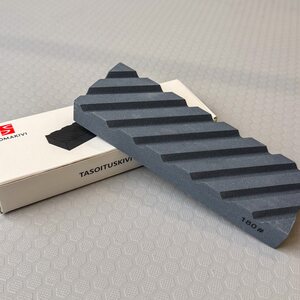
Die Herausforderung beginnt bei harten, vollkeramischen Steinen. Hier ist der Naniwa PA Abrichtstein eine funktionierende Option, die gerade stark genug ist für Steine wie Shapton Glass und Rockstar. Überraschend für viele: Der weichste Abrichtstein ist oft auch der schnellste. In vielen Fällen lässt sich damit sogar an härteren Steinen effizient arbeiten.
Das ist oft der Moment, in dem man erkennt, dass Härte allein nicht entscheidend ist. Die richtige Kombination macht die Arbeit deutlich schneller – und vor allem weniger frustrierend.
 Artikel»Schleifsteine»Zubehör»
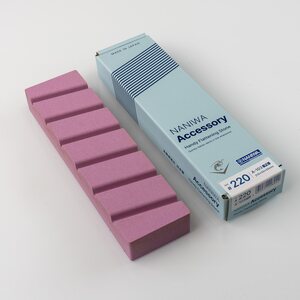
NaniwaFlattening Stone PA #220
24,00 €
Auf Lager verfügbar
(15)
Eine gute Praxis ist es, den Schleifstein vor jeder Benutzung leicht abzurichten. So bleibt der Arbeitsaufwand gering und der Prozess schnell.
Du kannst gerade oder kreisförmige Bewegungen verwenden – entscheidend ist Gleichmäßigkeit.
Bewege den Abrichtstein über die gesamte Fläche des Schleifsteins. Vermeide es, immer dieselbe Bewegung zu wiederholen.
Ich beschreibe das oft als „symmetrisch asymmetrisch“: Du bewegst dich in alle Richtungen, aber gleichmäßig verteilt.
Die Kontrolle des Drucks ist wichtig. Verwende leichten, gleichmäßigen Druck. Häufig liegt zu viel Druck am Anfang der Bewegung, was zu ungleichmäßigem Verschleiß führt.
Der wichtigste Faktor beim Abrichten ist das Bewegungsmuster.
Ein häufiger Fehler ist, den Abrichtstein in einem 45-Grad-Winkel aufzulegen, sodass die Kanten überstehen. Dadurch nutzt sich die Mitte des Abrichtsteins ab und der Schleifstein wird „bananenförmig“.
Ein gutes Muster ist diagonal von Ecke zu Ecke zu arbeiten. Ziehe vom rechten unteren zum linken oberen Eck und wechsle nach ein paar Zügen die Richtung.
Das braucht etwas Übung, macht aber einen großen Unterschied im Ergebnis.
Die einfachste Methode ist, ein Raster mit einem Bleistift auf die Oberfläche zu zeichnen.
Richte den Stein so lange ab, bis das Raster vollständig verschwunden ist. So siehst du genau, wo noch Unebenheiten vorhanden sind.
Auch Abrichtsteine nutzen sich ab. Ich sage oft: Der Abrichtstein richtet den Schleifstein ab – und der Schleifstein richtet den Abrichtstein ab. Das klingt zunächst seltsam, erklärt aber, warum falsche Bewegungen zu ungleichmäßigem Verschleiß führen.
Wenn du Unebenheiten bemerkst, nimm grobes Schleifpapier (P40) und bearbeite den Stein trocken mit gleichmäßigen Bewegungen.
So bleibt dein Abrichtstein lange effektiv.
Wenn dein Schleifstein nicht mehr „schneidet“, liegt der Grund oft genau hier. Der Stein ist nicht mehr plan – und ohne Abrichten bekommst du nicht die Leistung, für die du bezahlt hast.
Sobald du das Abrichten in deine Routine integrierst, verändert sich alles: Die Arbeit geht schneller, das Gefühl wird besser und die Ergebnisse gleichmäßiger.
Im folgenden Video findest du weitere praktische Tipps zum Abrichten und zur Auswahl des richtigen Steins.